Catalog widget
The home page will most likely include the Course Catalog, let's start with the following basic page:
<html>
    <head>
        <title>Catalogue</title>
    </head>
    <body>
        <p>Welcome. Below you can find a list of Courses that we offer.</p>
    </body>
</html>
Generate widget code
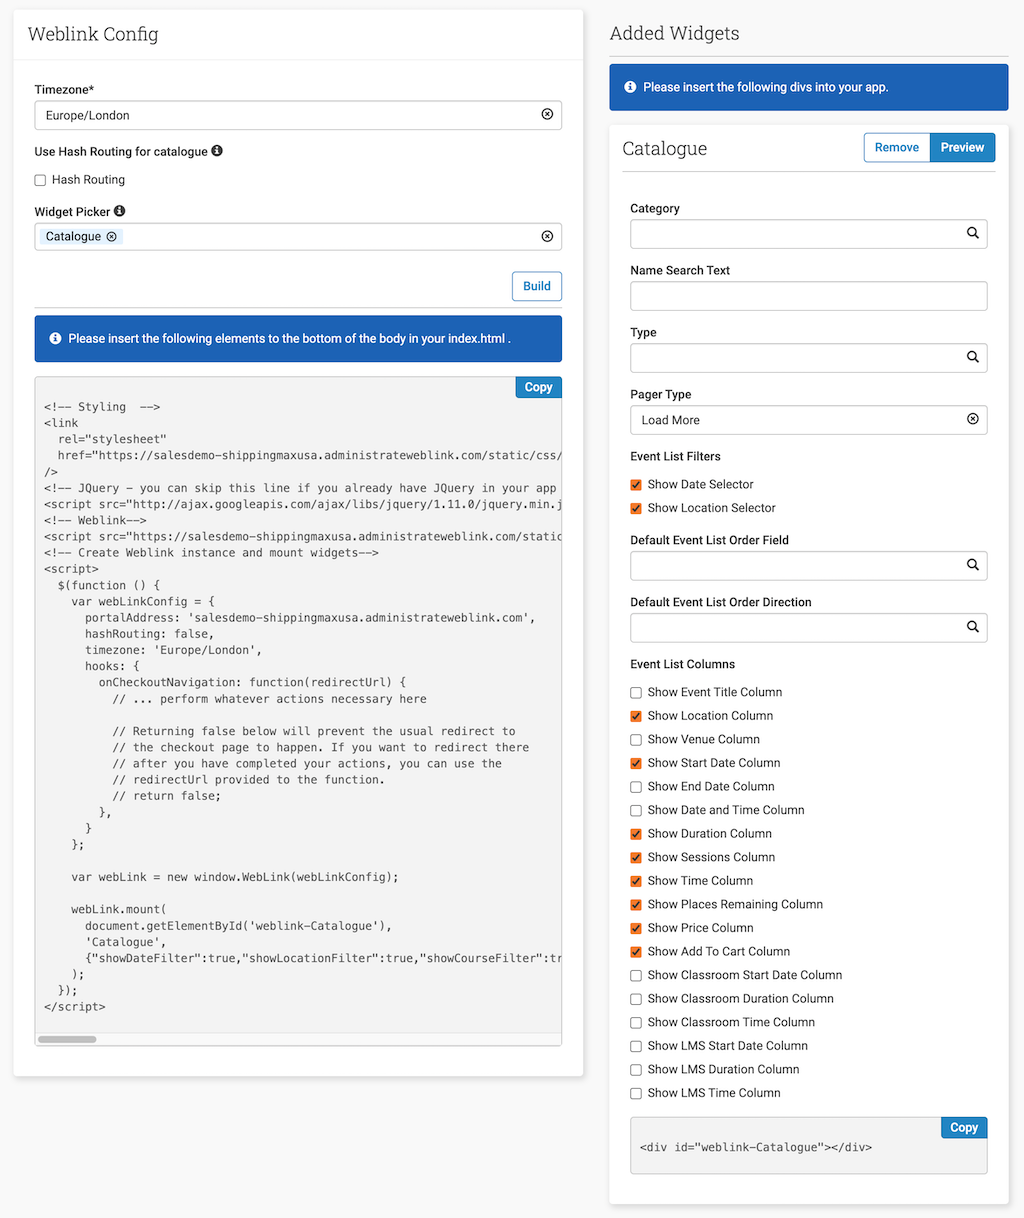
Our WebLink Widget Builder makes it easy to obtain the code necessary to embed the Catalog widget:
- Enter the URL of your configured WebLink portal and click "Connect".
- Select a time zone, to ensure any Event dates display correctly.
- Select the Catalog widget from the Widget Picker dropdown.
- After selection, the right-hand side allows for widget customisation (filters, ordering, display options...)
- Once happy with your selection, click "Build", which will generate HTML snippets:
- the left-hand side snippet should be added to the bottom of existing pages before the closing
</html>tag - the right-hand side snippet must be placed where you want the widget to appear
- the left-hand side snippet should be added to the bottom of existing pages before the closing

Embed
Given the page HTML above, we can embed the 2 snippets provided by the builder like this
<html>
    <head>
        <title>Catalogue</title>
    </head>
    <body>
        <p>Welcome. Below you can find a list of Courses that we offer.</p>
        <!-- right-hand side snippet copied from WebLink Builder -->
        <div id="weblink-Catalogue"></div>
    </body>
    <!-- left-hand side snippet copied from WebLink Builder -->
    <link
       rel="stylesheet"
       href="https://myinstance-portal.administrateweblink.com/static/css/main.css"
     />
    <!-- JQuery - you can skip this line if you already have JQuery in your app -->
    <script src="http://ajax.googleapis.com/ajax/libs/jquery/1.11.0/jquery.min.js"></script>
    <!-- Weblink-->
    <script src="https://myinstance-portal.administrateweblink.com/static/js/weblink.bundle.min.js" defer ></script>
    <!-- Create Weblink instance and mount widgets-->
    <script>
    $(function () {
        var webLinkConfig = {
            portalAddress: 'myinstance-portal.administrateweblink.com',
            hashRouting: false,
            timezone: 'Europe/London',
            analyticsHandler: function (event) {
                // Send event to the analytics provider.

                // For example, if using Google Tag Manager,
                //   1. Ensure snippet is added to your website according to the [instructions](https://developers.google.com/tag-platform/tag-manager/web)
                //   2. Then call: window.dataLayer.push(event)
            }
        };

        var webLink = new window.WebLink(webLinkConfig);

        webLink.mount(
            document.getElementById('weblink-Catalogue'),
            'Catalogue',
            {"showDateFilter":true,"showLocationFilter":true,"showCourseFilter":true,"showCategoryFilter":true,"showTitleColumn":false,"showLocationColumn":true,"showVenueColumn":true,"showStartDateColumn":true,"showEndDateColumn":true,"showDateAndtimeColumn":false,"showDurationColumn":true,"showSessionsColumn":false,"showTimeColumn":true,"showPlacesRemainingColumn":true,"showPriceColumn":true,"showAddToCartColumn":true,"showClassroomStartDateColumn":false,"showClassroomDurationColumn":false,"showClassroomTimeColumn":false,"showLmsStartDateColumn":false,"showLmsDurationColumn":false,"showLmsTimeColumn":false,"pagerType":"full"}
        );
    });
  </script>
</html>
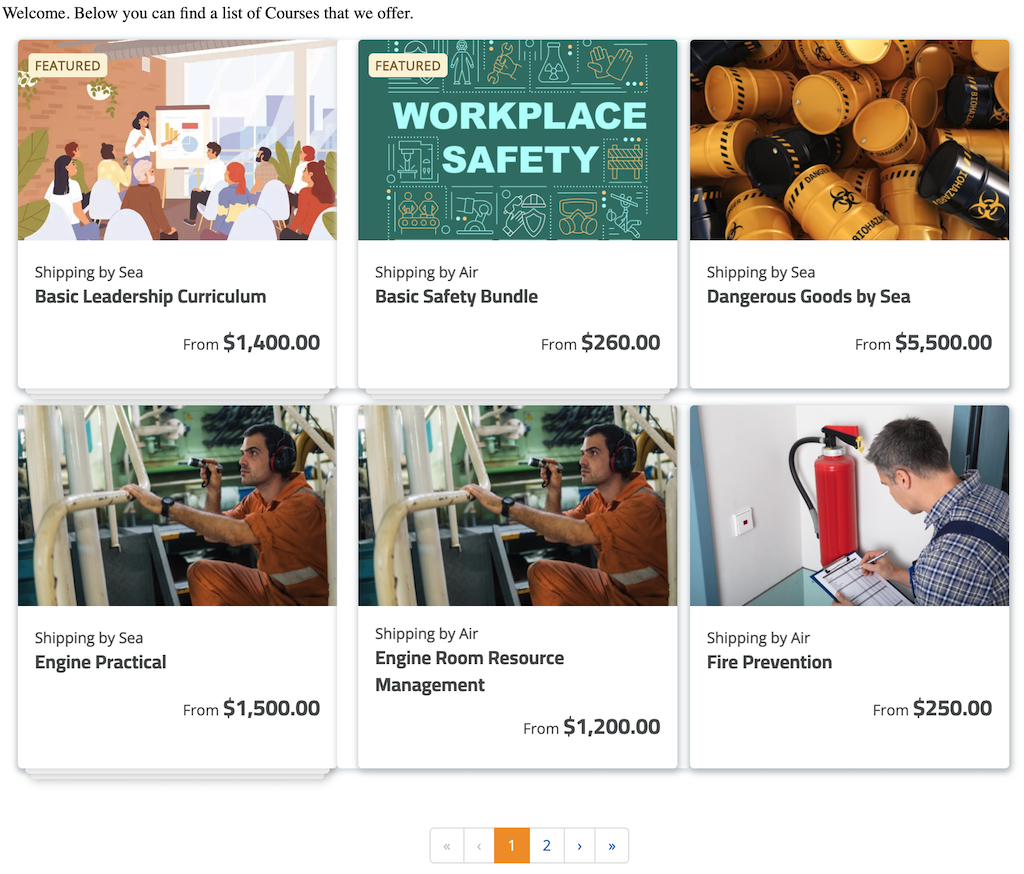
If everything is configured correctly, you should see the Catalog being displayed on the page:
